Saturday 4 October 2014

Dance time


Tomorrow my baby girl has her end of year Calisthenics concert, and couldn't be more excited.  This will be her third time on stage this year with her team as they perform Folk, March, Rods and Exercises. She's been doing calisthenics since she was 2, so this is her fourth year but this has been the year that she has really started to pick it up, and it has been amazing to see her improve so much.
 
Backstage (March costume) 2011, 2yrs old

March 2012 (courtesy Kellies Pix), 3yrs old
 
 
 Miss M has very low muscle tone and was seeing a physio weekly for a while there to try and strengthen her core, develop balance and improve her coordination (there was also concern that she may have Developmental Coordination Disorder, but it looks like it may have just been her very different motor planning that she used to manage her low muscle tone).  However I just couldn't keep juggling work, school, calisthenics, swimming lessons, scouts for the boy (to help his social skills development), and his OT sessions and decided that the physio had to stop.  They told me that as long as she stayed in swimming and calisthenics they'd be happy to let her go, but review her again at the end of the year.  We have yet to have that review, but I think that she will be fine given her improvement this year.
 
Exercises 2012 - Madelyn on left (Courtesy Kellies Pix)
She is really loving her dancing this year, perhaps because it's finally "clicking" for her.  So as a bit of a reward for her efforts, I have let her enter into solo competitions again.  So now I am busily gathering tulle, designing, cutting and planning her solo costume, for the end of year concert marks the start of solo season. 


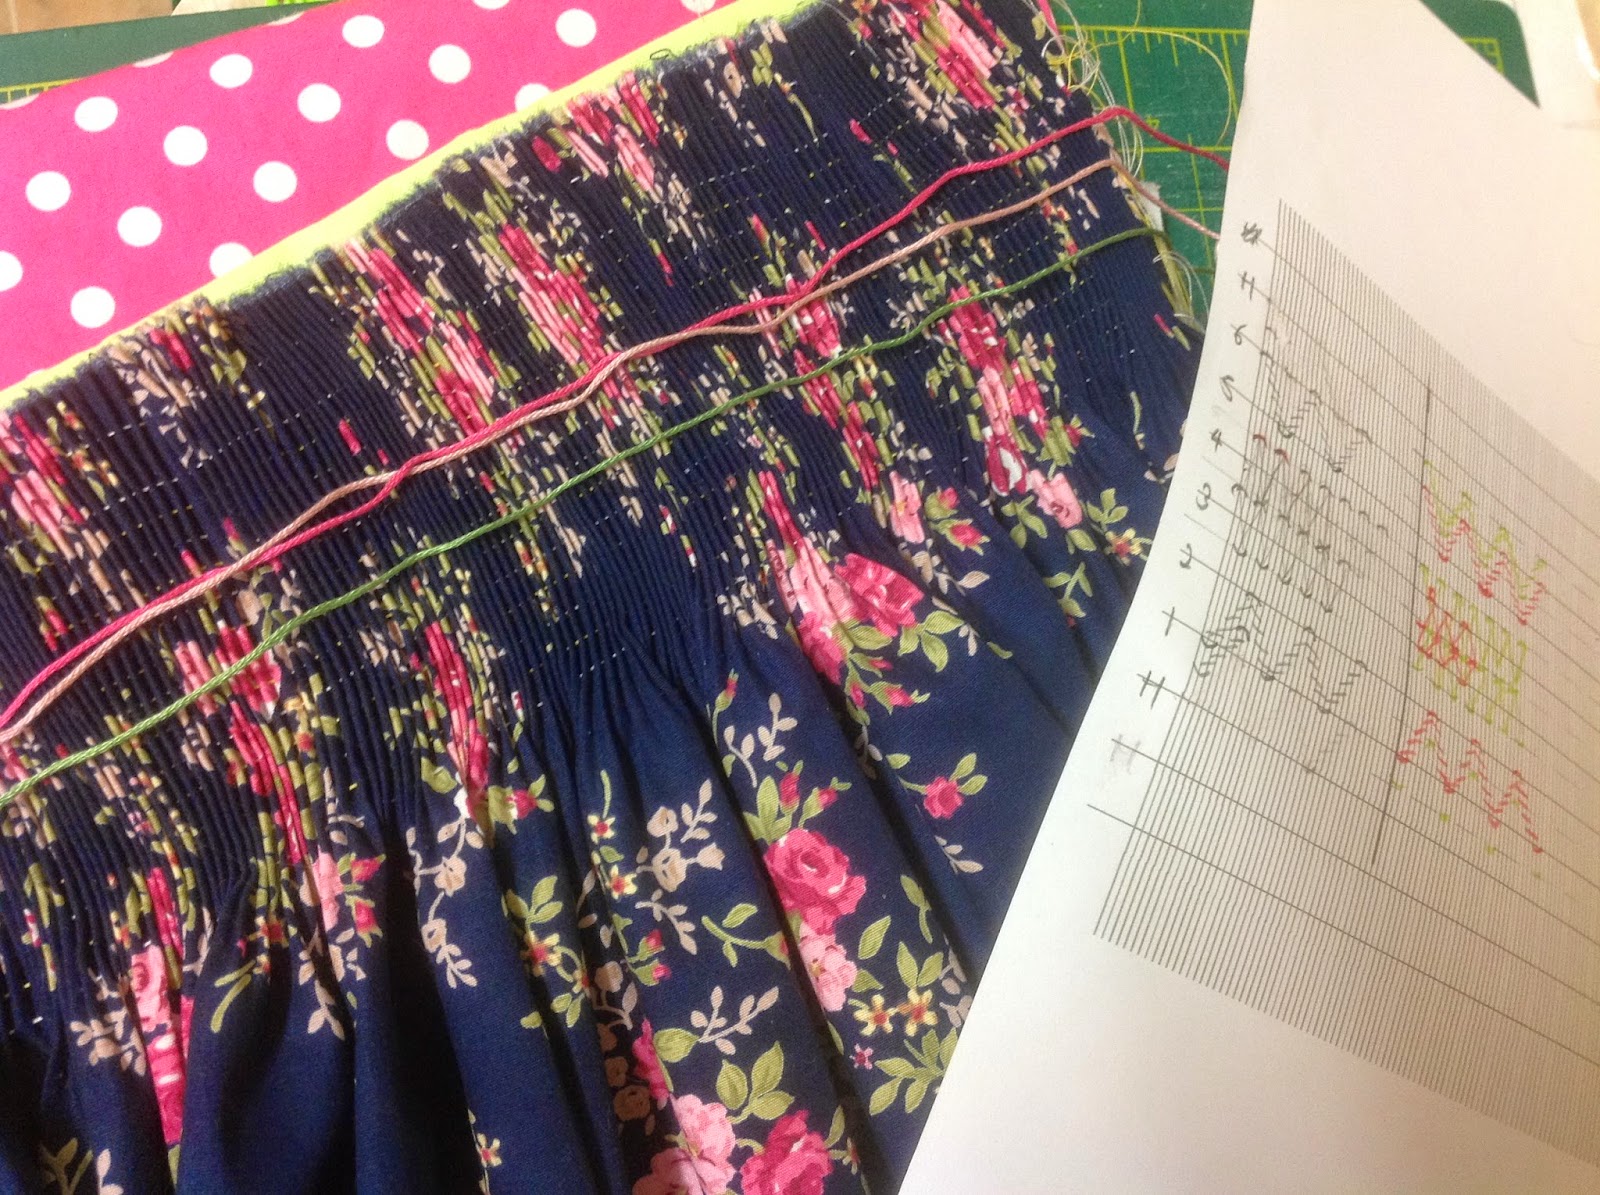
 While I sew her calisthenics costumes for the team items (there were 4 this year), they are always designed and precut for me, and I just have to work out how to put them together  - I get a photo, and the cut pieces with no labels or instructions, so it can be a bit frustrating at times.  But come solo time, I get to design the costume myself, based on the music her coach selects.  Tonight I am having fun with hot pink, black and polka dots to create a 50's rock'n'roll style costume.  Miss M is so excited she gets to wear pink (last year she was a bright yellow bigbird)!
 
Practicing her solo - 2013, 4yrs old
 

Friday 3 October 2014

Blogtober - Day 2

Oh my, not doing well, day two and I am already running late with my post!  Well only if we look at it technically, I can get away with it if I tell you I haven't gone to bed yet, and it's still the 2nd in many parts of the world.

I'll keep it brief tonight (as I really should get my beauty sleep!), I was sidetracked by my new found love - smocking.  I have booked the kids in for a day of Minecraft Camp on Monday, and need a project to take with me as I don't feel comfortable leaving Master A there, especially since it's quite a way from home and he can get a bit overstimulated when he has a long stint of computer time.  Normally he's limited to an hour max, to avoid meltdowns but on Monday he is getting a whole day!  Since I finished off my quilt binding and got a bit bored with my knitting at the kids art classes this week, I decided I needed to have some smocking to mix up with the knitting through the day.

So Sally Stanley (the mother-in-law's pleater) is having a sleep over tonight.  After movie night with the kids, I prepped my fabric and pleated it, taking a bit longer this time as I had to work out how to shift the needles around and do half rows.  It was my first whole piece too and I found it dragged a lot more than the insert did - inserts are a breeze to pleat!   Then I spent hours trying to work out a smocking plate from a photograph of a gorgeous dress that inspired me.  Got there in the end, but too indecisive to pick a floss colour this late at night.  Tomorrow... although I really should get to those curtains and save this for Minecraft Camp! After roller-disco today we have bowling on the agenda tomorrow morning and then quiet time in the afternoon so a good block for curtain sewing.


Do you have a craft that suddenly has you hooked?  I can't imagine not having a smocking project to work on regularly now!


Wednesday 1 October 2014

Blogtober 2014 - Day 1

Ok, so I am going to mention right from the get go - I am not too good at these things.  Life tends to get in the way, or I aim to high and then feel I don't have enough interesting stuff to post but hey, I am up for the challenge!  And that is to blog every day in October.  I know there is probably a linky party somewhere and I'd love to join it if I can find it, but for now I am happy to party along on my own.

So today my topic is...

What's hot right now?!

In the world of my sewing desk that is.

Well I am on holidays right now, and amongst kid activities while I am home with them (a rare opportunity due to plant shutdown during school holidays) I am also trying to stock up Miss M's summer wardrobe.  Master A hasn't really grown a lot this year (nothing new) while his sister seems to be on an endless growth spurt.  As the weather has warmed up over the last week or two, clothes from last summer are slowly meeting daylight again, but also having a tough time squeezing over her.  So my big goal this holidays is to sew as much as I can for her while I have a little extra time.

The next priority is a new pair of sheer curtains for her room.  You see her room has the most glorious morning aspect, with sunlight streaming through welcoming the cats.  Lotta has always loved that front window ledge, especially first thing in the morning (I swear she bolts there as soon as she hears me open the sunouts).  I think in her constant leaping on and off the window ledge she may have been the one who caused a small tear in each curtain.  But then along came a crazy playful ragdoll kitten, fondly known as Marvin, who took great pleasure in taking a little tear and making it huge.  In fact we now have about 50cm torn from the bottom of one curtain, almost halfway across!  The man at the curtain fabric shop told me they love pets - they give them a lot of business! (I still haven't replaced the curtain in the family room that the English Mastiff, Lewis enjoyed for breakfast one morning - but that one isn't seen from the street!)  So alas I have some boring sewing ahead of me, thanks to said furballs and the fabric arrived today.  No doubt I will have a nagging voice in my ear from the man of the house if he catches me sewing something other than curtains until they are done.

And finally, some cuteness to look forward to - Miss M pulled out all her Australian Girl Doll clothes today and took stock, telling me all the things her Emily needs to get through the summer. Big A told me we have too many cupboards full of fabric too, and when I told him most of it is leftovers that are too small to make things with unless I buy stuff to go with it, he suggested the unthinkable (throwing it out!).  Doll clothes will help dig a dent in that stash. 


I should make them in secret and save them for her birthday, but I don't think l I have the self control for that.  They are too stinkin' cute, and I have to give them to her as soon as the last stitch is stitched, to see her face light up and to beg her to try them on Emily right away!  Take these teeny little shorts - how can I hang onto them until December?!

Monday 29 September 2014

Selfish Sewing Week 2014

As usual, my own wardrobe is fairly bare. I spend more time sewing quilts, or clothing for my kids than I do me, and don't get a lot of time sans kids to go shopping (most of my kid free time is spent working, doing the supermarket shop or perhaps the occasional gym visit).

So when I realised it was selfish sewing week, I decided I'd better squeeze something in for me.


Being on holidays a few days before the kids gave me a chance to nip into spotlight and pick some fabric. When I saw this gorgeous summery cotton sateen, I immediately grabbed it and tucked it under my arm to make an Everyday Skirt (by O+S designer, Leisl + Co). But I was also hunting down fabric for a dress. I was looking for something a little lighter for my dress, but I loved the print so much, I decided I would just go with it (despite the dress pattern calling for lighter weight fabrics) and tucked a bolt of plain blue linen under my arm for the skirt instead.

I used the Tank Dress pattern by Sew Caroline, and did the optional pockets and elastic casing for the back, thinking the fabric was a little heavy for shirring. While the pattern is well presented and the dress has a nice modern shape, with a comfy fit, I wasn't super impressed by the instructions. It is such a simple design that it would be a great beginner's pattern, but there was quite a bit left up to your imagination. There was no information about seam finishing (of course I serged all my seams anyway), and I was a little unsure how to get a professional finish with the pockets having never done any like this before (crazy right, after all these years sewing!). I knew I wanted to top stitch somewhere to make sure they always sat the right way, but wasn't sure where, or when to do it, and had trouble lining them up perfectly when I did my side seams. I have since inspected a bought garment with similar pockets and have a much better idea about how to do it next time, but with a pattern at that price I'd expected the detail to be there. The pockets sit a little low on me too.


I lined my pockets with a solid lemon broadcloth, being a lighter weight fabric to sit more comfortably, but they still take a bit of fiddling to get them right when I put on the dress. All in all though, I am happy with the finished product, there's just a few things I'd do differently next time. I'd recommend that beginners leave off the pockets for their first dress. The fit is great, and ease of wearing is everything to me! This is something I can comfortably throw on and dress up or down.

Now, I have to apologise for the photography - this is what happens when the hubby gets called in to take the pictures. I got two iPhone shots, one blurry and that was it. Now you see why last year's selfish sewing went unpublished! But at least I have something to show you this time.

Thursday 25 September 2014

A new trick


I have always loved the look of smocking, and when I brought my new baby girl home almost 6yrs ago, my mother in law told me "I promise to show you how to use my pleating machine to make her little smocked dresses!"  I was very excited, but scared all the same - I am one of the worst hand stitchers around (and the cali mums can probably all tell you how much I complain about sequin sewing and how slooooooow I am at it!).  Well, it was never mentioned again and in those first few colicky months I hardly had time to sew, and then just as she started to sleep well, we started her on solids and her then unrealised food intolerance had me sleeping less than three hours a night and it was NOT the time to learn new tricks.  Suddenly I was back at work, and she was such a big bubba that she quickly grew into little girl clothes, and I thought smocking was really just for babies and it would be too difficult to find patterns for her.


So when I saw the Ellie Inspired Smock Along previews being posted on her facebook page, and that the pattern went from size 1 all the way up to size 16, I thought now is the time!  Especially since we were just working on an insert and then sewing it into a simple looking peasant dress, it took a little intimidation out of it.  (If you're interested - there is still time to grab your pdf pattern/tutorial for just $4 while the SAL is still running)


I bought my fabric at Fabric Pixie, as there is quite a bit of fabric in this one I limited myself to sale prints only.  I was delighted to find this Riley Blake Sidewalks print in their bargain bin (small floral in cream and starburst in blue) and may have also been tempted by a few other pretties while I was there!  I used a plain broadcloth in cream for the insert, and took it to my mother in law's house to learn how to do the pleating.


I mostly followed the guide on Ellie Inspired, but had my mother in law there to help me get acquainted with Sally (Stanley Pleater).  I went very slowly, terrified of breaking needles, but she wasn't so scary after all!  And once I got home and started stitching, I found it very difficult to put my needle down.  Once I got into a bit of a rhythm it was quite relaxing and I was a little sad that it was finished so soon!


Then it was onto blocking and the really scary bit of sewing in my insert.  I haven't worked with micropiping before, so went very slowly to avoid wonkiness and I was a little anxious when it came to trimming the edges of my insert.  I also discovered that not all pleaters are created equally and over ten rows of smocking, my insert was over an inch narrower than other SAL participants, and therefore didn't line up with my back bodice AT ALL!  So I had to unpick my elastic casings, and trim the bodice back before redoing it all.  Then it was onto all those ruffles.  I did pick up my ruffle foot, still in it's pack from my birthday... in January... and promptly put it back down, deciding I had already pushed myself outside of my comfort zone enough for this project!


This dress took a lot more time than I had first expected (partially due to my trepidation at all the new skills), but I got there in the end, and the main thing, my princess LOVES it.  As you can see, it fits her perfecty, and it was great to have the designer there to answer my questions as I went.  So pleased Laura ran a sew-along to help me learn this beautiful craft. 


Madelyn modeled for me straight after school (so excuse the messy hair) and refused to take it off, she even went and played with her DOLLS afterwards, so unheard of, so maybe it helped to bring her girly side out!


I also found a great stitching group at Country Bumpkin: Create In Stitch, and can't wait to start another smocking project.  Apparently a doll version will be coming out soon, but I know I will want a bigger project, so in the meantime, I am eyeing off this one.  Thinking of doing the sleeveless version for summer, with a smocked skirt and with the ruffles on the neckline.  Now to find the right fabric!


Tricks to remember for next time:
  • Use a highly contrasting thread for pleating the fabric on ALL rows, alternating two colours to help with row counting.
  • Pleat with half rows if the design calls for it (I pleated my fabric in preparation before the smocking plate was released, and if you look closely you'll see those ribbon casing stitches aren't all exactly even as I had no half row to help me).
  • Spray starch the insert after pleating, to help those pleats stay crisp and standing up straight while you smock. (Completely wet it and leave it to dry).
  • If you really must pre-block, make the width about 1/2" to 1" less than what you want at the end - it's easier to stretch out after smocking than to squish it all up again as squishing will make your stitches looser and with lots of handling, it's bound to relax a little.
  • Remember the post block makes all the difference, and it doesn't matter if the pleats shift a little while you smock as your stitches pull everything together and the blocking corrects any unevenness.
  • Relax and enjoy it!
PS. Madelyn has now titled it "The Ribbon Ruffle Dress" and was quite challenging to photograph with all her "Ooh La La!" exclamations, and silliness as it reminds us a little of Fancy Nancy!

Monday 22 September 2014

Twirling fun!

I am sure I haven't told you all enough times how much I love E+M Patterns!  Allison is the most pattern designer I know, and I love testing for her. So far I have tested Girl's Shirt & Dress No.6, Boy's Tank No.10 (yet to be released), her free leggings pattern and Girl's Dress Pattern. No.13. (Pssst... you didn't hear it from me, but there is a new gorgeous knit version on the way soon - keep your eyes peeled!).  In return for testing, not only have I received the final versions of each pattern, but she also let me pick another pattern from her store.  So yes, you'll see more E+M reviews in here!


 After my first test, I simply HAD to have her Skirt Pattern No.1, perfect for a girl who loves to spend much of her day flitting and twirling about.  I made a size 8, forgetting that I can often get away with a 7 on the bottom half of my giant 5yr old, so it is a little roomy but that means it should last her through until at least next Autumn, and maybe still fit at the start of next Summer.


Being a full circle skirt (with no seams on the skirt portion), it does take a little more fabric than most skirt patterns.  However, I managed to scrape it into a single metre, by using a plain white cotton for the upper skirt lining (a stash busting win!).  The pink contrast print was simply a leftover piece from a teacher gift from a couple of Christmases ago, and I probably could have managed to get the waist trim from it too, but was worried that it wasn't the perfect colour match, so grabbed some pink solid scraps I had left over from Maddy's kindy back pack.


The skirt came together pretty quickly and easily.  I did cheat though and overlocked the upper skirt to the twirly bit, rather than following the instructions to fully enclose the seam in the lining.  It probably wouldn't have taken much longer, but I am a bit lazy!


The pattern comes with a cute doll size, so of course I had to make Emily one too, but as I was scrounging to get the skirt out of my single metre, there wasn't enough left for a mini version.  So I flipped the fabrics instead.  

When I gave the skirt to Madelyn to dress her doll, a sudden cry of "but she doesn't have a t-shirt to match" rang out from her bedroom as she rummaged through dolls clothes.  Not to worry - a Jocole Classic Tee to the rescue!  She watched me sew it together and was thrilled at the addition of a heart applique.  I think I will do a narrower neck band next time though, and girly up the pattern a little more with sleeve puffs and bindings.


Then we realised Madelyn had outgrown most of her tees from last summer too, and needed something to go with her skirt.  I knew straight away that it had to be an E+M shirt - she has 3 of these now (plus the dress version), and they turn out beautifully every time.  I modified it ever so slightly to have woven ruffles rather than knit.  In order to ensure the woven didn't restrict movement at all, I cut the ruffles on the bias and also gathered them up a little more to take up less of the arm scythe.  I probably needn't have worried though, and thought this would probably work very nicely with a bit of lace or broderie trim in the place of the ruffles.


You should have seen her little face light up when I told her she could wear the set on the weekend!  I felt really mean when I made her take the skirt off after the photo-shoot to put something a little more practical for bike riding in.  I think we need a few pairs of shorts next, to keep them both well dressed on our family bike rides to the beach through the summer.

Friday 12 September 2014

Kitty cuteness


I was delighted to test another sweet pattern from E+M Patterns last month! This one is Girl's Dress Pattern No.13.  It comes in sizes 2 -10 (made in size 8 for my super tall 5 year old).

I was so excited when she released the pattern to testers on my day off work, which just so happened to be a non-OT day, which left me the afternoon to sew!  I spent a good half hour browsing fabrics in peace that morning while I waited for the release of the pattern.  I tried out a fabric store recommended to me by Karen, that isn't far from where I live, yet I never knew about it.  It was a gem of a find!  I looked at the gorgeous fabrics, and was trying to decide between two floral fabrics when I spied the bargain bin.  I saw this sweet Japanese kitty fabric at an amazing price, and although I thought it might be a bit much for a dress, I knew it would be Miss M's pick, for sure.  Once I got it home, I loved it more and more - especially when I found some perfectly coordinating fabrics hiding in my stash!


The top part of the dress is lined, and you can sneak a little peak at the bright pink leaf fabric lining the bodice of my version in the cute "Mummy Shot" above (isn't she adorable?!), and the elastic waistline is accented with faux ties from a lemon/lime spot fabric that coordinates with the little flowers on the print.


I couldn't resist adding a cute kitty face applique, to make her smile even more.  I love seeing that beautiful smile!  I had planned to do covered buttons with the pink leaf fabric I used in the lining and applique ears, but alas, I only had big buttons, the shops were closed and I needed to get it finished for photos.  Trusty Sculpey to the rescue, I made some marbled polymer clay buttons, using a loose button in my stash to imprint detail and mark the position of the holes.


The dress hits just above her knees, so it's the perfect length for summer (although I may make some little pink knit shorts to hide underneath as she's an active little kiddo!), but also great for layering with leggings on cooler transitional days in spring or autumn.  It is a fairly simple style, so it's perfect for play or slipping over bathers poolside, but also gives plenty of room for dressing up with embellishments or accessories.  I can just imagine it with a few contrasting ruffles down the front, or a sweet little cutout in the neckline.   What makes this pattern shine is the perfect fit, and the details in the seam finishing.  I love things that sew up quickly so I was very tempted to hit the overlocker, but held myself back and followed the instructions instead.  I have to say, I love the end result, even if it was a tiny bit more fiddly.  What I got for my extra half hour of time was a neat little dress inside and out, with no itchy seams to bother her, so it really was a win!


Most importantly, my little girl adores this dress.  It is a big hit, and I am sure it will get plenty of wear before her next growth spurt! Knowing her, she'll probably want to keep wearing it when it stops fitting!

Eek - I almost forgot! If you are looking for a FREE leggings pattern to make to go with this dress, grab it from E+M Patterns while you're there!  I was also one of the testers for this one, and again the fit is exactly how I like it.


Friday 22 August 2014

Owly fun

Every now and then I go on a knit bender.  My recent knit pattern testing for E+M Patterns (so far a top, dress, leggings and tank top) has had me itching for some new, fun, knit fabrics.  Unfortunately it pretty limited around here, but I decided to splurge one evening with some Crafty Mamas online shopping!  


 I have this sudden attachment to Lillestoff - but it is so expensive, especially when your kids aren't babies anymore and you need more than a 50cm cut for most things!  However during a flick through my Ottobre magazines (well, I was meant to be reorganising them but I got distracted!) I found a top that needed only a 50cm cut of print for the front, and the sleeves needed less than 50cm too.  I thought I could utilise a solid for the back (since they are easy enough to come by and not nearly as expensive).


So I quickly added a half a metre of these bright and funky Lillestoff owls plus the stripes to my cart and checked out before I could think twice about how much one t-shirt was going to cost me.  When I went to cut the top out, I was delighted that I could actually fit the back piece across the cut too!  


The pattern is number 28 from Ottobre 4/2012 (lots of cute knits in that one!).  And the fluff ball had to get involved in this shoot too...

Book week snuck up again!


 Of course it comes awfully quick when you're working 4 days a week and running around with OT appointments and such on the 5th.  Madelyn wanted to wear the Alice in Wonderland costume I made her last year, when she was 4 and the size 6 I made her seemed to have plenty of room for two years running... Well no, not really, she's well into a size 8 now, after a big winter growth spurt.

So a new costume idea had to be generated! Every time she goes up a reading level at school (which happens often, sometimes skipping a level or going up three weeks running!) we head off to the book shop and buy her a new book, just as we did with her big brother.  "The Amelia Jane Collection" was one such book, and a big favourite for my cheeky little girl.  When she was disappointed about her Alice costume being too small, the mention of Amelia made her giggle and grin, and I had to remind her that Amelia is good sometimes too, usually when the toys teach her a lesson, so she'd have to be Amelia on a good day!

Silly me though - I had thought this will be easy, red dress, white tee, cardboard blue button and some make-up.  Not so easy.  Miss GrowsTooMuch has a very bare wardrobe at present  and not a single red dress!  Luckily Rabbit Rabbit Creations came to the rescue with their Hummingbird Dress pattern.  It was soooo quick and easy, and by luck, I happened to walk into spotlight on a 30% off day and just about fell over this bolt of the perfect red floral fabric with a slight vintage style.  I loved making this easy and well fitting dress, and look forward to doing one with ruffles on the straps as a more fancy sundress for summer.  

The button (which I realised after the fact I drew the wrong type!) was simply a few layers of card, with a piece of watercolour paper stuck on top, and I had fun shading and blending with my little artist girl's aquarelles.  I made a couple of blue ties for her hair bows, and grabbed a pair of striped tights from her drawer (lots of black and white striped tops in shops right now but no tights!).  In my haste to start work by 8am (and the kids needing to be dropped off at OSCH) I forgot her stitching lines on her face, but she didn't notice, luckily!  She's normally a stickler for detail.

Austin was going to go as Joshua Dread, from teh second book where he gets his super hero suit, so I bought spandex in black red and grey, all set to make it the night before dress up day, when he suddenly decided he wanted to be Timmy Failure.  Timmy wears a white tee and black shorts and sneakers.  That's it.  Soooo easy!  But not good for a wet, gloomy 15C day.

I had a think, and came up with Ben from Gangster Granny - since there was very little time to organise a new outfit by then and no shops open!  (By the way, if you have an 8yr old, who hasn't read any David Walliams, get to it - the kid will be in stitches!). Thankfully he was happy with that (after lots of arguing about being Timmy).  So I quickly whipped up a mask and sack, pulled gloves from the dress up box and an easy outfit from the wardrobe.
  

I had the giggles dropping them off before school - he was acting the part perfectly - tiptoe walking with his knees bent exactly like on the cover, his right hand holding the sack (filled with polyfil) and his left hand reaching out twitchy fingers.  It was like the book cover came to life.  They had a fantastic day, and that is what counts!

Wedding bells...


So it's the middle of winter, my Mum was about to remarry (a small family wedding with the grand kids invited), and my daughter had grown considerably in just a month or two!  I knew I could manage to throw together an outfit for the little man who hasn't really grown in ages (who is still drowning in the size 8's I bought him at the end of summer in preparation for the cooler months!) but the girl hardly has anything in the wardrobe that fits her.  It's a good thing she's at school and wearing uniforms, as I can (just) manage to keep her clothed and warm for the weekends!


I had a quick look around the shops (hard to do with a boy who often screams at the idea of leaving the comfort of home, and is a nightmare to go clothes shopping with - those clothes racks are too tempting for him to go hide under!).  However it's really tricky to buy warm things in the middle of winter (the shops seem to change seasons to spring earlier every year!), and now that she is well into an 8 (sometimes a 9 or 10 due to a broad chest, but then they are too long) she is in the "teenager" category, which is often not suitable for my sweet (not so) little 5 year old girl.


So I did a call out in my favourite facebook group for inspiration - PDF Sales and Promotions.  The specs were: has to be comfy, formal but could be worn to a not quite so fancy event without looking over the top, warm,  and a pattern that goes up to at least 10 (since she keeps on growing and some 8's have small chest measurements).  The top contenders were both from My Childhood Treasures - the Elke dress, and the Colorblock Dress. The decision was tough but I went with the latter.  It was perfect!

The pattern is designed for sweater knits, but I chose good quality (read expensive!) Ponte instead to make it a little more fancy, and so it would fall nicely, lighter for twirling etc.  I worried afterward that perhaps I should have sized down to account for the thinner fabric but glad I didn't.  There was plenty of room for a long sleeved top underneath for the cool, wet day, without it looking too big, plus I know she'll get to wear it again before she grows out of it in the blink of an eye like she does!


I topped it off with a headband (just used a hand drafted pattern for a basic headband with elastic in the back) and fabric flower (free tutorial here).  The flower was meant to be made from t-shirt fabric but I used the leftover grey Ponte to make it match.  It stuck up a little bit more that I wanted but still looked cute.  I was going to edge the petals in silver glitter glue but forgot to buy it in my dash through Spotlight.

Then the night before the wedding I decided that Austy couldn't just wear any old shirt, but he had to match her.  Of course! This was my Mum's wedding we are talking about, they needed to look special!  So I sat down to sew him up a new long sleeved shirt (Lenni from Ottobre 6/12).  Let's just say I have learned my lesson - a shirt may be ambitious for one after work evening of sewing - especially when it has sleeve plackets!  I have made him short sleeved shirts before (and think I may have made him a long sleeved shirt years ago for his uncle's wedding but have no recollection of it - in my baby brained half asleep state!) but the sleeve plackets on this one drove me insane!  It took me an hour and a half just to work out the pictures. Once I got it though, it was an "ah ha!" moment and the second one took me 5 minutes. I had also regretted my decision to use a contrast top-stitching thread several times - it shows up wonky lines (from being tired) and took time to keep changing threads, but in the end I am glad I went with the charcoal stitching. It matched the buttons perfectly. I used just a plain shot cotton for the main fabric and some leftover charcoal spotted fabric from the baby quilt for the inside collar stand, sleeve cuffs and front placket.  Looks so cute with the top button undone and the contrast peeking through.


Then there was still the tie to make (a free download from Ottobre - designed for 5-7yr olds).  I whipped it up, rather rushed and bleary eyed as my bed was calling me, and finally hit the pillow at 4am!  The tie was a bit short, I had thought I could get away with it with my small 8yr old, but not quite.  The tension issues I was having in the early hours of the morning (too tired to fix - I just sewed it up anyway) meant that the tie twisted easily, but it still looked cute, and helped coordinate the two kids' outfits.

The kids were adorable, and it was well worth the late night (although I need to remember how long that shirt took so I don't put myself through that again!). We made it to the wedding on time (just!) and the kids were very well behaved through the long, catholic ceremony. A few people from my new Step-Dad's family thought they were twins! The wedding was an early one, with a lunch reception, which meant there was time for a much needed nap at the end of the day while the kids watched a movie next to me on the couch. Aaahhhh....

Thursday 7 August 2014

And the winner is


Marimba!

Who wrote:
Afternoons lazing the hours away down at the lake :-) the kids love it, its relaxing and a great at to spend a sunny day

Congratulations - I hope you enjoy sewing up this top as much as I did.

I held open my drawing an extra day due to a slow response, giving the ladies who responded by the original close date an extra entry for fairness. Even then I didn't draw it on time because I was madly working on this.


This was where I was at on Saturday afternoon, with the baby shower it was for, just hours away! No, I didn't make my deadline, but took it anyway to show the new mum.

You see, the day I bought my fabrics, I brought them home, made the first cut and my phone buzzed, of course it was the announcement that my good friend's baby had decided to come early - just over 6w!

So he turned my plans upside down. Instead of whipping up an outfit the weekend before the baby shower, I whipped up a preemie outfit the following Friday night, took a quick snap and dropped it off at the hospital the next day hoping it would cheer the new mum up a little after she had to leave without him on the Wednesday.

(Patterns are from my extensive Ottobre Design collection- an itsy bitsy size  45cm!)

Then it was a drop everything kind of experience as I rushed on with the quilt, aiming to make it for the baby shower instead of the expected due date. Alas, I didn't get there, but I came close. Just a few lines of quilting to go before I can get that binding on.

And a final note: Apologies for such a very late post - blogger has been playing games with me and not letting me post pictures... and then I couldn't get into my account.  But I am here now.  Congrats again Marimba!

Friday 25 July 2014

E+M Pattern Shirt No.6 Review and Give-away!


Recently, I was lucky enough to be selected to test E+M’s newest pattern: Girl’s Shirt and Dress Pattern No.6. This pattern is designed for soft, stretchy knits – quick to make and comfy to wear.  I had a lot of fun with this one, making it three times already to try out some of many different options.  Top or dress?  Flutter sleeves or sleeveless? High-lo or straight hem?  Pin-tucks, gathers or pleats at the front bodice?  A-line or banded dress?  See?!  Now you know why there was no way I could stop at just one. I think Miss M needs a few of these dresses in time for summer, when we spend our days in bathers ducking in and out of the pool.  So easy to just throw over the bathers when we duck out. 


Of course, it’s too cold here right now to wear a tank-top, so I have plans to mash up this one with a long sleeved Ottobre Design pattern.  I also have a few half metre cuts of knit prints that I never got around to sewing up when she was actually short enough to get anything from a meagre half metre, so I plan to slice up my pattern for a solid upper and print lower to make use of those cute, but too short cuts.


The pattern is well-fitting, and computer drafted so it is easy to get great results.  The tutorial is super thorough, with clear photography at every step of the process and for every option.  E+M Patterns designs with beginners in mind, and in particular, designs so that you can still get a neat finish without an overlocker.  I used both an overlocker and a twin needle for all of mine though, and her instructions didn’t leave out more experienced sewers like myself either.  I really loved being a part of this testing group as the garment is well planned out, and Allison was so helpful, really listening to all of her testers to make sure her pattern was the best it could be.


Now for the give-away!  Allison has so kindly offered to give a copy of this new PDF pattern to one of my blog readers!  So if you’d love to get ready for the warmer months (or if you are in the northern hemisphere – make something for right now!), simply add a comment telling me your favourite kid-friendly activity on hot summer days.  I will pick a winner next Friday and announce it here.


If you’re keen to start straight away, don’t hold back – her pattern is on sale for today only (until 12pm Friday - Pacific Time).  Head on over to E+M Patterns and check it out!